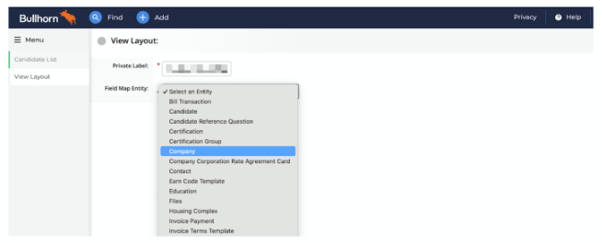
From the View Layout screen, select “Company” from the Field Map Entity drop-down.
Adding the Paiger Tabs
From the Company View Layout click on the Custom Tabs tab.
From here, you will need to add three new tabs. To add these, click “Add New”.
The details for each tab you need to add are listed in the table below.
|
Tab Name |
Enabled |
URL |
User Types |
|
Research (Paiger) |
Yes |
https://crm.content-app.com/find_bullhorn_user_in_contentapp_api/action_prospector_method_start_page |
Add the user types you would like to be able to use this tab. We recommend limiting access to recruiters, not system admins, to avoid clutter. |
|
Vacancies (Paiger) |
Yes |
https://crm.content-app.com/find_bullhorn_user_in_contentapp_api/action_vacancies_method_default |
Add the user types you would like to be able to use this tab. We recommend limiting access to recruiters, not system admins, to avoid clutter. |
|
Outreach (Paiger) |
Yes |
https://crm.content-app.com/find_bullhorn_user_in_contentapp_api/action_links_method_default |
Add the user types you would like to be able to use this tab. We recommend limiting access to recruiters, not system admins, to avoid clutter. |
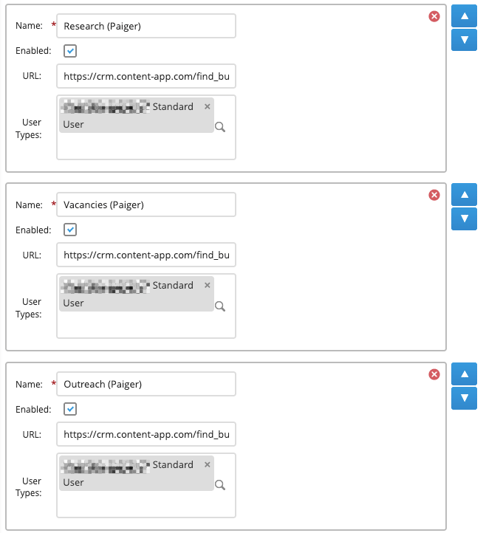
You can change the order in which these tabs appear by using the up and down arrows.
Once completed, click “Save”.